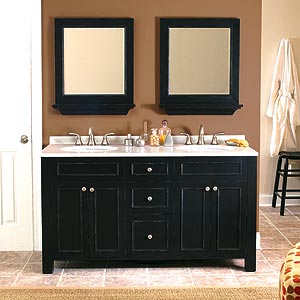
Turn Your Furniture Into A Bathroom Vanity


 Looking for a new bathroom vanity but overwhelmed by the prices? Old furniture you have on hand, such as a dresser or desk, might offer a unique and affordable alternative. While not an easy DIY project, perhaps you can tackle the furniture retro-fitting and call in the Sacramento plumbing experts to put it all together.
Steps for Creating the Vanity
The project will require a vanity, sink, faucets and a variety of power tools that include a jig saw, a nail gun, a power drill, a tape measure, and hinges. Additional plumbing parts may also need to be purchased.
1. Select the dresser to use. Check to ensure length and height is okay (bath vanities should be about 33″ high) and look at the areas of the dresser will need to be cut away to allow for plumbing.
2. Measure the height of the plumbing in the wall in the bathroom with your tape measure. Transfer the measurements to the back of the dresser. Drill a starting hole in the back of the dresser and then use the jig saw to cut out a square to position the dresser around the plumbing.
3. Remove the top drawer of your dresser and then remove the face of the drawer from the body. This needs to be done with the jigsaw or by removing any support screws. The face of the drawer can be attached back onto the dresser with hinges. Attach the flip-down hinges to the bottom of the drawer face. Add a tray to the backside of the drawer face for storage.
4. Cut a hole for the sink (and or drain if using a vessel sink) into the top of the dresser. If you are using a new sink, then set it on top and use a pencil to trace an outline. Make a hole for the blade of the jigsaw and then cut out a hole. Drill holes for the sink if any are necessary for the faucet.
5. Determine if any drawers can be reconfigured around the plumbing. If you determine that none of your drawers can be reconfigured, then the all the drawer faces need to be removed. You will need to use the nail gun to attach the drawer faces to the dresser. Make sure that you use finish nails with the nail gun when attaching the drawer faces.
6. Sand the dresser with light sandpaper. You will then need to seal the surface with varnish to protect the wood from water and moisture. Do several coats to ensure it can stand up to water drops over time.
Tip: You can also have glass, tile, or a stone top cut to place on top of the existing wood for added durability.
7. Another option is to paint the cabinet by using an enamel paint. Enamel paint will also protect the wood from water. Add several coats of paint and sand with a fine grit sandpaper between for a smoother, more professional finish.
8. Drop your sink in the top of the new vanity. You could have a set in sink or choose a vessel sink that sits on top.
9. Connect plumbing drains and water supply. If unfamiliar with P-traps or other requirements of the plumbing system, you may want to contact a professional plumber for this final step.
Hope this inspires and helps you tackle your next home improvement project. Remember, for any of your plumbing needs, the experts at Ace Plumbing are ready to help, contact us today.


